
A key benefit of tools like Primavera P6 is auto-scheduling, where activity dates move automatically as your project plan changes.
This article will show how to enable auto-scheduling in Primavera P6, and demonstrate the feature in a simple example.
A key differentiator between Microsoft Excel and a project and portfolio management (PPM) tool is the ability to auto-schedule. In Excel, your activities are all independent of one another, so the dates of one activity do not affect another. But in a PPM tool, your activities can be interdependent, so that a schedule slippage in one activity correctly delays the entire project. Primavera P6 has an auto-scheduling feature, although for project managers more familiar with Microsoft Project, it may feel hidden away. This article will show you how to turn this feature on and use it.
1. Let’s start with a simple project plan that is not auto-scheduled:

You will notice that the second activity, Define resource list from kickoff meeting report, is scheduled to start prior to the first activity, Project kickoff meeting. This doesn't make sense, because we can't do anything with a kickoff meeting report that hasn't been written yet!
We started down the right path by defining a dependency between the two tasks. Specifically, we've defined Project kickoff meeting as a predecessor to Define resource list from kickoff meeting report. You can read our article on adding dependencies in Primavera P6 if you don't know how to do this. However, because we're not auto-scheduling, the start/finish dates of the activities do not reflect this dependency.
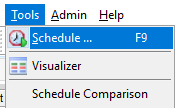
2. To change this, go on the P6 ribbon to Tools > Schedule...
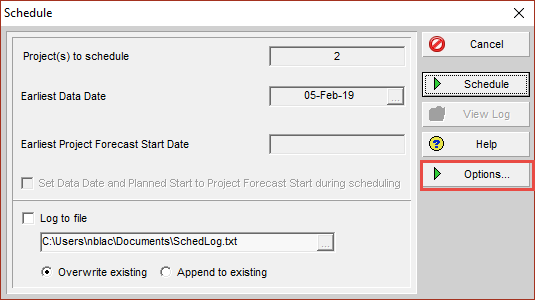
3. From the dialog box that appears, choose Options...
4. ow, on the General tab, turn on the checkbox for Schedule automatically when a change affects dates.
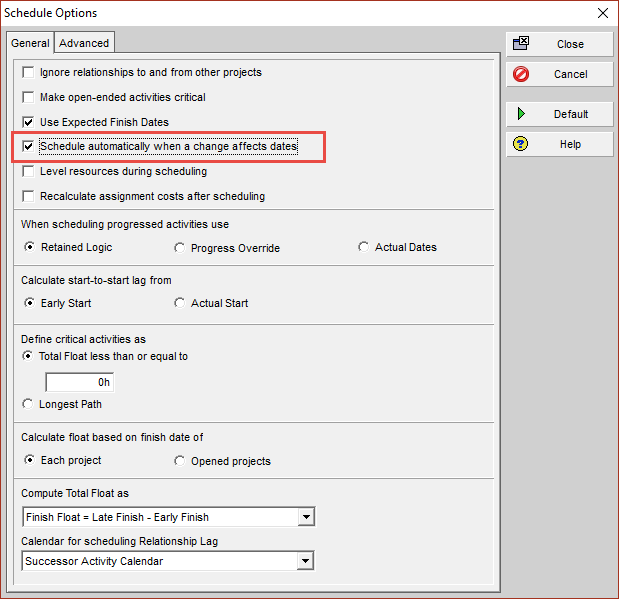
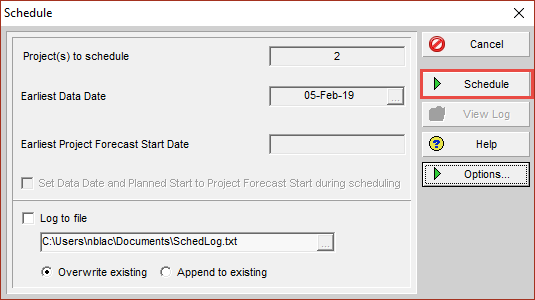
5. Hit Close to commit this change to Schedule Options. Then, back on the Schedule dialog box, hit the green Schedule button.
6. Back in your list of activities, you will see that the start date for Define resource list from kickoff meeting report has adjusted to fall on the same day as Project kickoff meeting.

Going forward, as we add new activities and dependencies to our project, the dates will automatically shift to reflect an accurate project plan.
The original article appeared on: https://www.onepager.com/tips/primavera-p6/auto-schedule-in-p6.html
A key differentiator between Microsoft Excel and a project and portfolio management (PPM) tool is the ability to auto-schedule. In Excel, your activities are all independent of one another, so the dates of one activity do not affect another. But in a PPM tool, your activities can be interdependent, so that a schedule slippage in one activity correctly delays the entire project. Primavera P6 has an auto-scheduling feature, although for project managers more familiar with Microsoft Project, it may feel hidden away. This article will show you how to turn this feature on and use it.
1. Let’s start with a simple project plan that is not auto-scheduled:
You will notice that the second activity, Define resource list from kickoff meeting report, is scheduled to start prior to the first activity, Project kickoff meeting. This doesn't make sense, because we can't do anything with a kickoff meeting report that hasn't been written yet!
We started down the right path by defining a dependency between the two tasks. Specifically, we've defined Project kickoff meeting as a predecessor to Define resource list from kickoff meeting report. You can read our article on adding dependencies in Primavera P6 if you don't know how to do this. However, because we're not auto-scheduling, the start/finish dates of the activities do not reflect this dependency.
2. To change this, go on the P6 ribbon to Tools > Schedule...
Going forward, as we add new activities and dependencies to our project, the dates will automatically shift to reflect an accurate project plan.
The original article appeared on: https://www.onepager.com/tips/primavera-p6/auto-schedule-in-p6.html
Comments
Post a Comment